


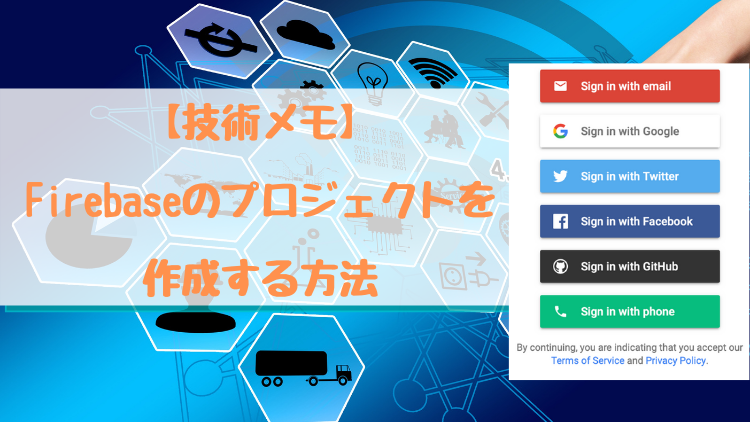
【技術メモ】Firebaseでソーシャルログイン機能を作る方法

本記事の内容
WEBサイトを作成にあたってSNSアカウントを使用してログインを機能を作ってみたいと思い調査したところ「Firebase」というサービスがあることを知りました。

Firebaseでソーシャルログインの作成手順
事前準備
Firebaseで新規プロジェクトを作成する方法
作成手順
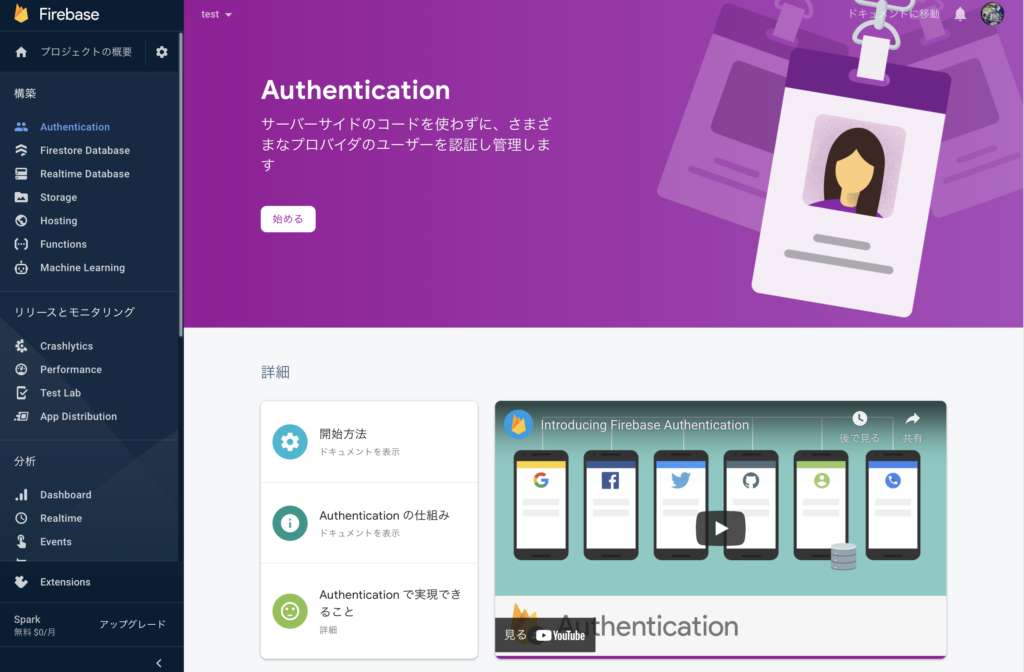
①「Authentication」の「始める」にアクセスします。
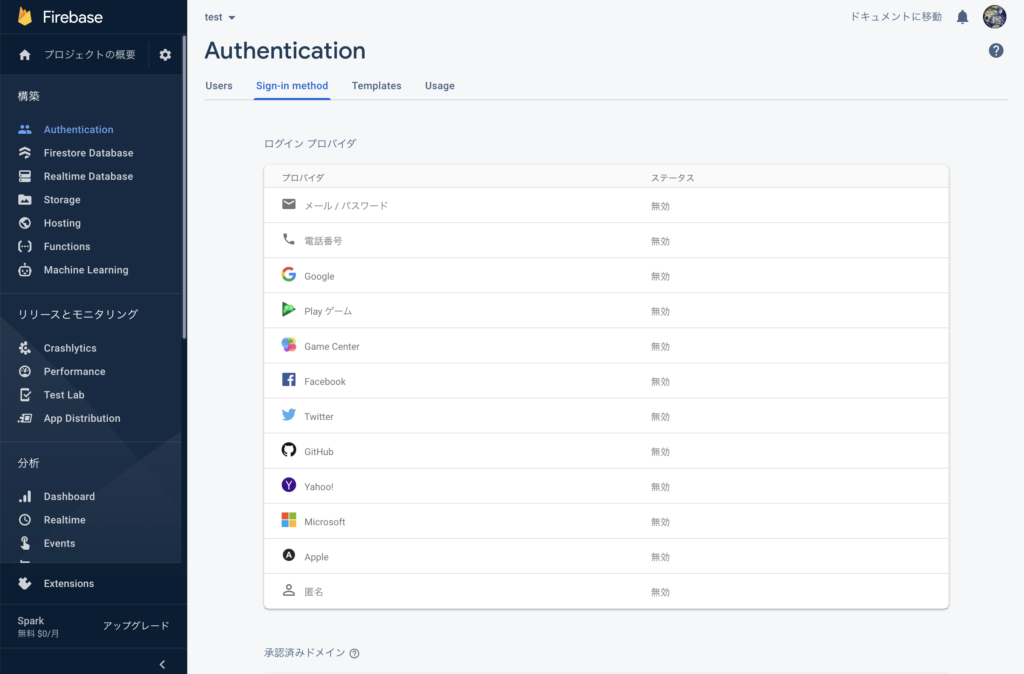
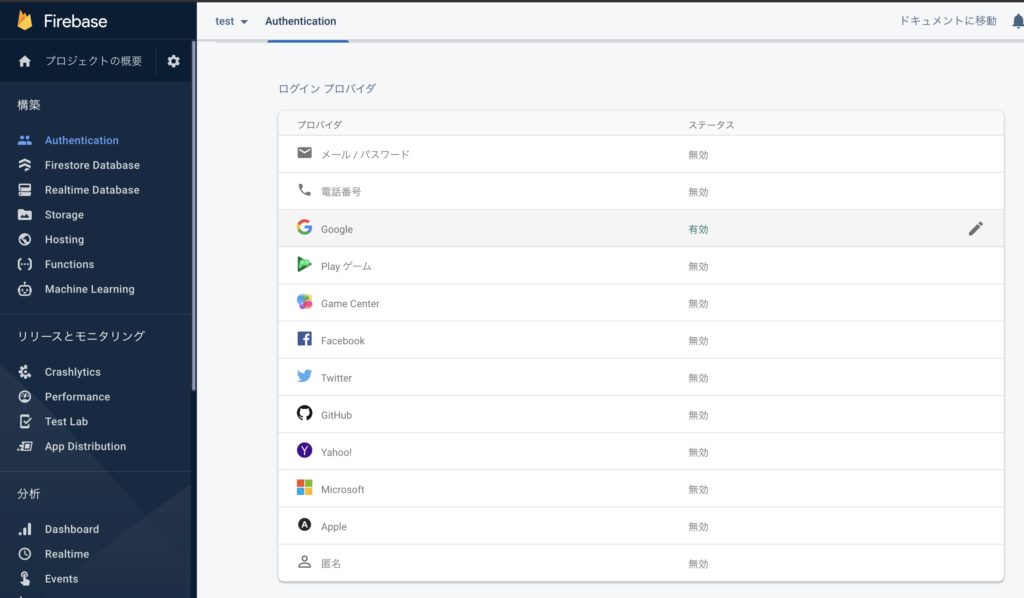
②「Authentication」の「Sign-in method」タブを開いて「Google」を選択します。
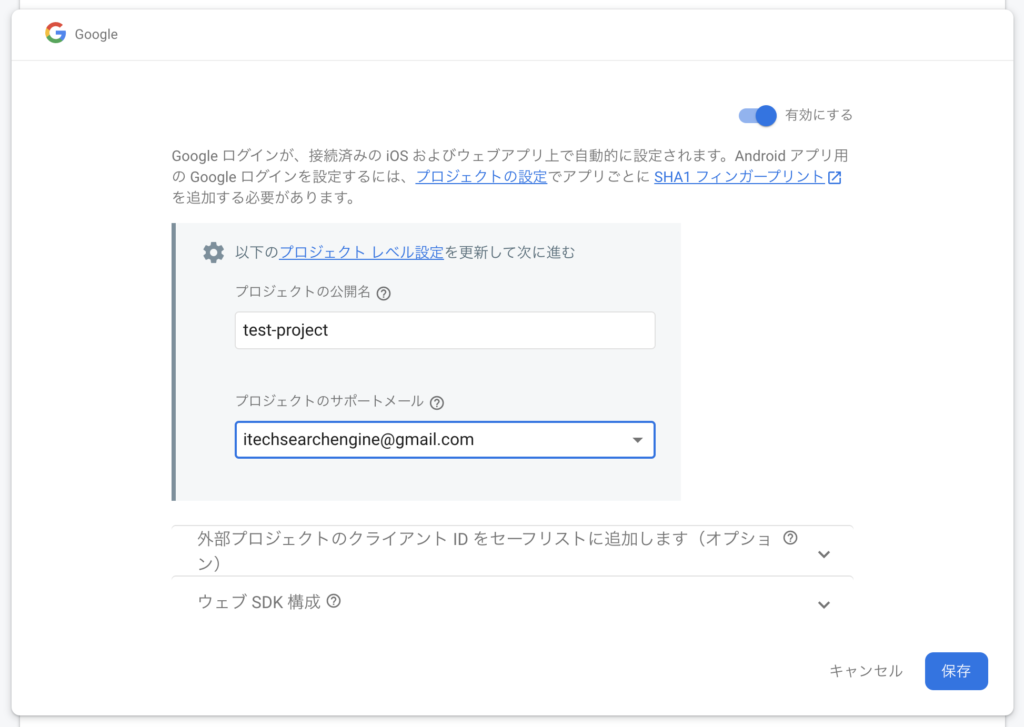
③「有効にする」にチェックを入れます。
変更前
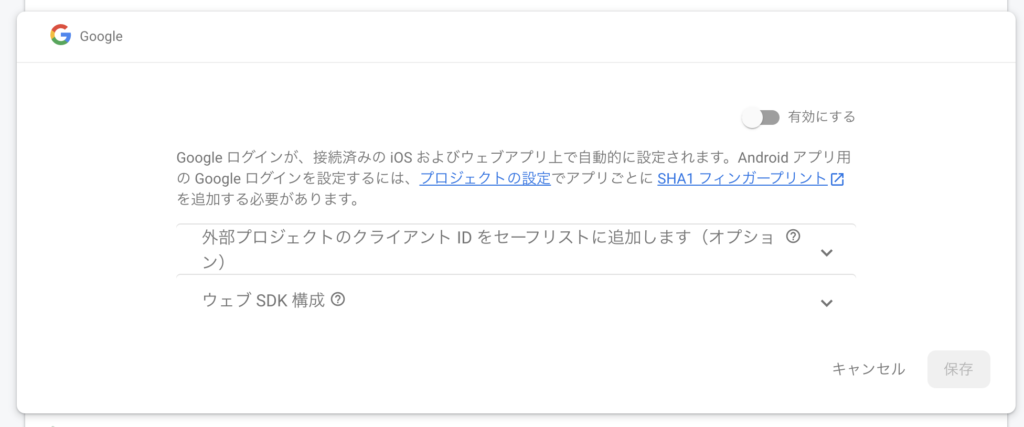
「有効にする」にチェックを入れると「プロジェクトの公開名」と「プロジェクトのサポートメール」を設定するウィンドウが出てきます。
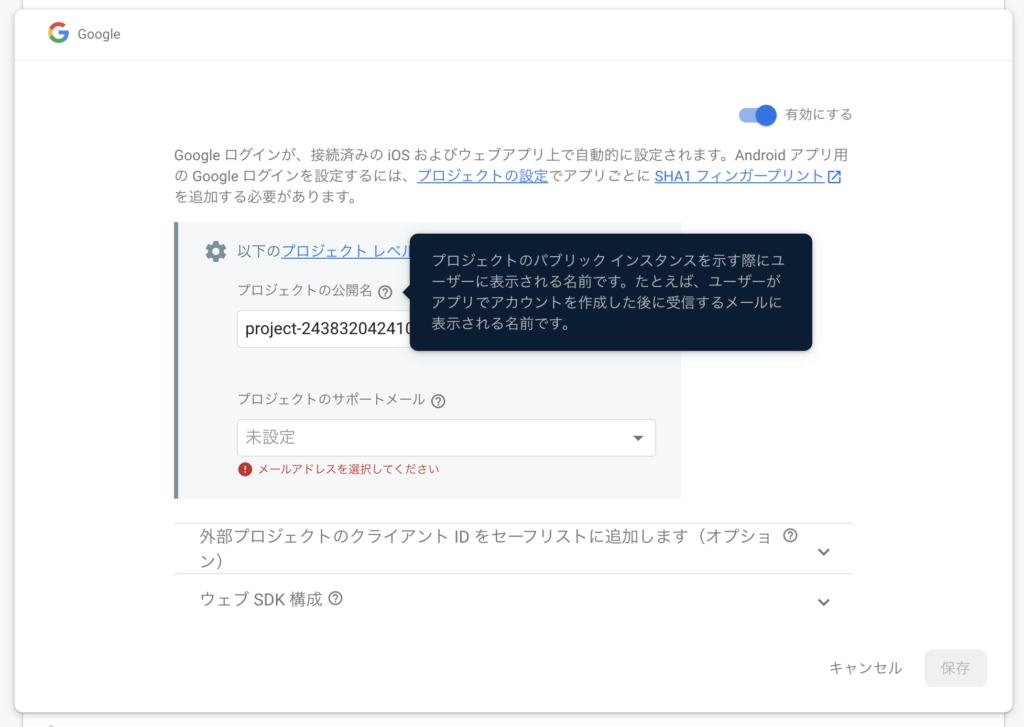
④「プロジェクトの公開名」と「プロジェクトのサポートメール」を設定し、「保存」を選択します。
それ以外の設定は特に変更していません。
⑤「Google」が有効になっていることを確認し、「プロジェクトの概要」を選択します。
⑥「ウェブ」と書かれているマークを選択します。

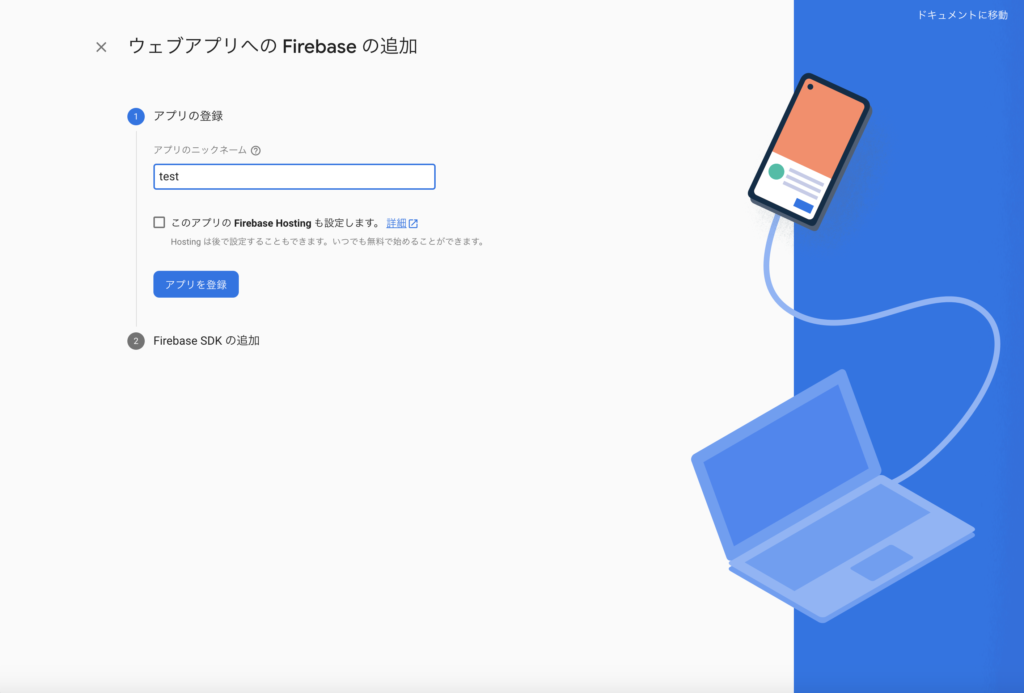
⑦ウェブアプリへのFirebaseの追加をします。
変更前
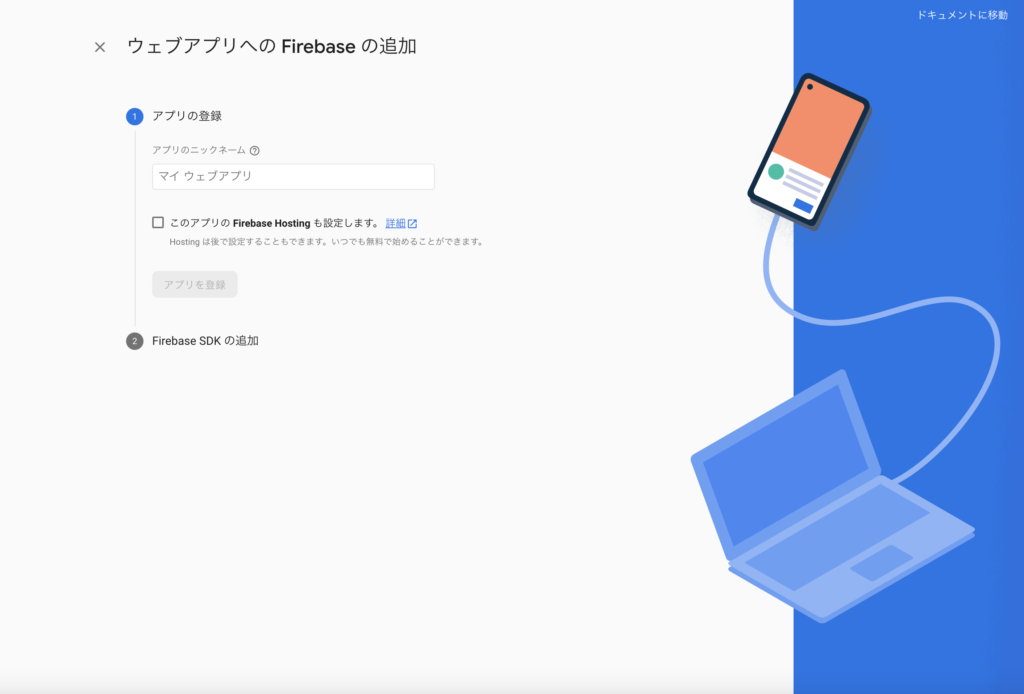
アプリのニックネーム「test」
「このアプリのFirebase Hostingも設定します。」にチェックは入れません。
「アプリを登録」を選択します。
⑧スクリプトは後で使います。確認できたら、「コンソールに進む」を選択する。
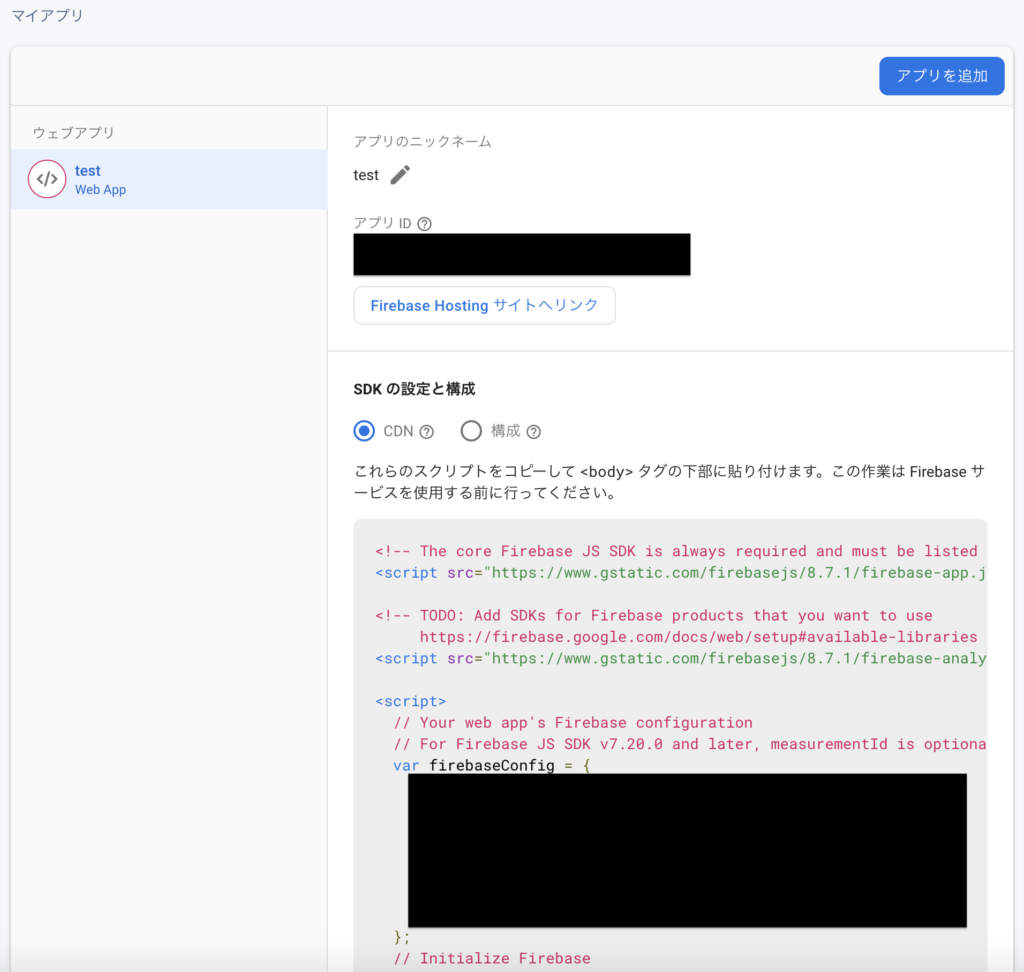
※黒塗りで隠してある部分はapiKeyなどの情報が記載してあります。
スクリプトのコピーを忘れても後から確認できます。
確認方法は⑨に記載してあります。
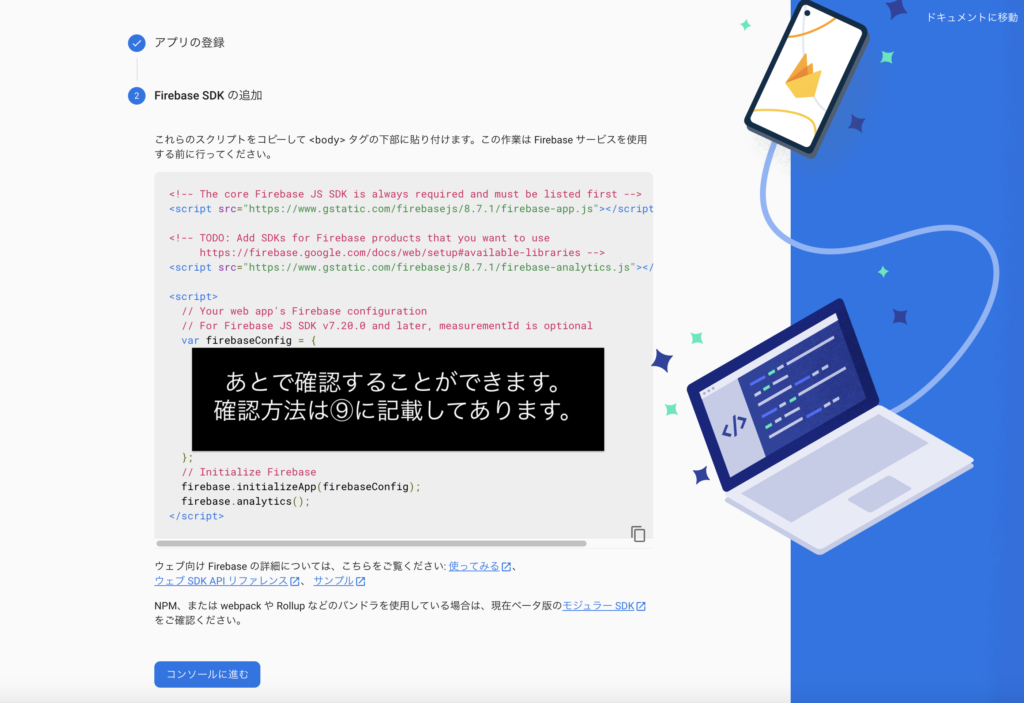
⑨スクリプトを確認する。
「プロジェクトの概要」を選択します。
「test」の歯車マークを選択します。
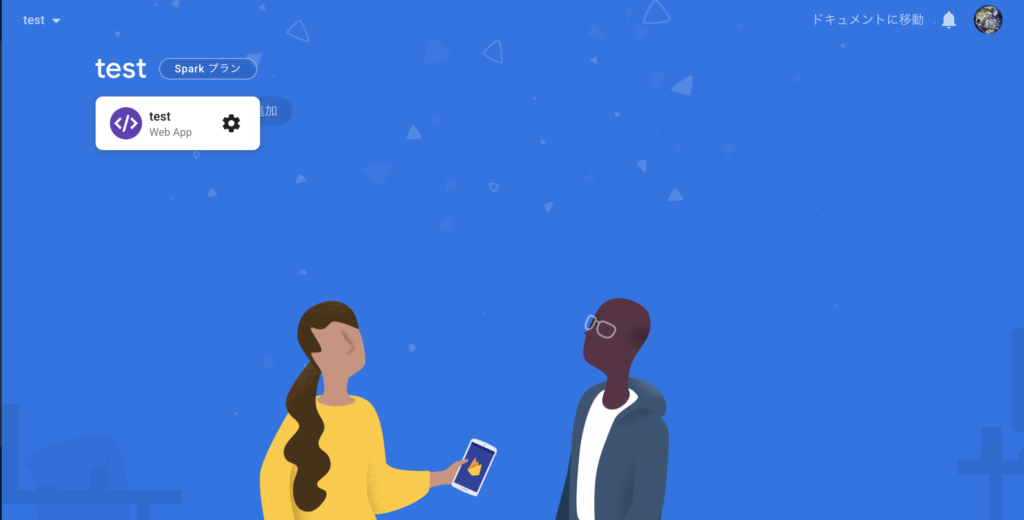
「SDKの設定と構成」に⑧で表示されたスクリプトが表示されます。
サンプルソースコード
TOPページ
Googleのソーシャルログイン画面を作ります。
<!DOCTYPE html>
<html lang="ja">

<head>
    <link type="text/css" rel="stylesheet" href="https://www.gstatic.com/firebasejs/ui/4.8.0/firebase-ui-auth.css" />
    <meta charset="UTF-8">
    <meta http-equiv="X-UA-Compatible" content="IE=edge">
    <meta name="viewport" content="width=device-width, initial-scale=1.0">
    <title>home</title>

    <script src="https://www.gstatic.com/firebasejs/ui/4.8.0/firebase-ui-auth.js"></script>
    <link type="text/css" rel="stylesheet" href="https://www.gstatic.com/firebasejs/ui/4.8.0/firebase-ui-auth.css" />

    <!-- The core Firebase JS SDK is always required and must be listed first -->
    <script src="https://www.gstatic.com/firebasejs/8.7.1/firebase-app.js"></script>
    <script src="https://www.gstatic.com/firebasejs/8.5.0/firebase-auth.js"></script>
    <!-- TODO: Add SDKs for Firebase products that you want to use
     https://firebase.google.com/docs/web/setup#available-libraries -->
    <script src="https://www.gstatic.com/firebasejs/8.7.1/firebase-analytics.js"></script>

    <script>
        // Your web app's Firebase configuration
        // For Firebase JS SDK v7.20.0 and later, measurementId is optional
        var firebaseConfig = {
            ////////////////////////////////////////////////////////////////
            //                                                            //
            //               ここの情報は⑨の方法で確認することができます。          //
            //                                                            //
            //                                                            //
            //                                                            //
            ////////////////////////////////////////////////////////////////
        };
        // Initialize Firebase
        firebase.initializeApp(firebaseConfig);
        firebase.analytics();

        let uiConfig = {
            callbacks: {
                signInSuccessWithAuthResult: function () {
                    return true;
                },
            },
            signInFlow: 'popup',
            //認証成功後のページ
            signInSuccessUrl: './success.html',
            signInOptions: [
                firebase.auth.GoogleAuthProvider.PROVIDER_ID,
            ],
            // 利用規約のページ
            tosUrl: './terms-of-services.html',
            // プライバシーポリシーのページ
            privacyPolicyUrl: './privacy-pocily.html'
        };

        let ui = new firebaseui.auth.AuthUI(firebase.auth());
        ui.start('#firebaseui-auth-container', uiConfig);
    </script>
</head>

<body>
    <div id="firebaseui-auth-container"></div>
</body>

</html>
ログイン後のページ
ログインが成功した後に表示される画面作ります。
<!DOCTYPE html>
<html>
<head>
  <meta charset="utf-8">
  <title>Firebase Auth for Google</title>
</head>
<body>
  <h1>ログインできました</h1>
</body>
</html>
実行画面
実行結果の画面

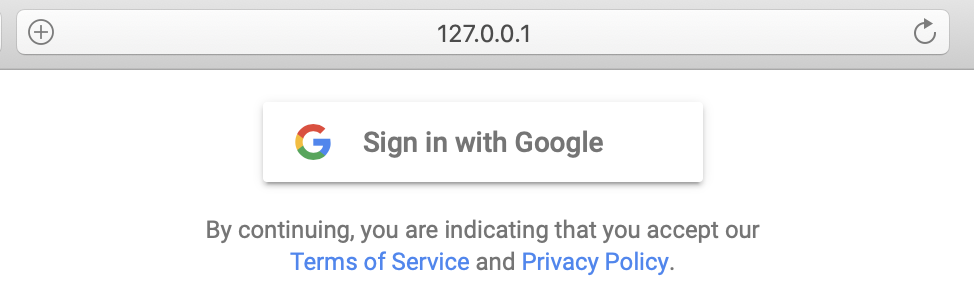
この状態で、「Sign in with Google」を押してみます。
エラー発生!エラー発生!エラー発生!
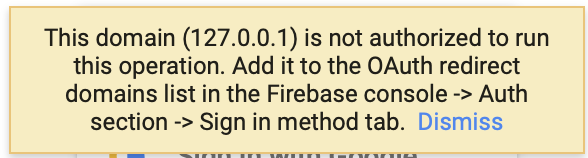
 Auth section -> Sign in method tab. Dismissが表示された時の解決方法">
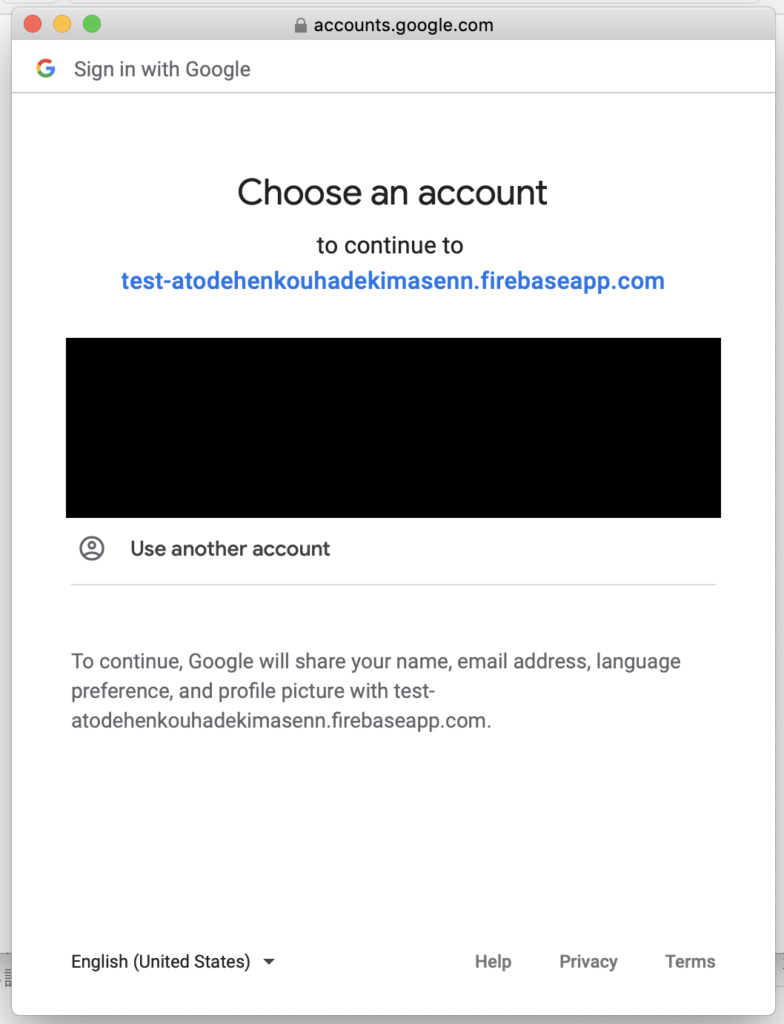
ログインアカウントの選択
「Choose an account to continue to test-atodehennkouhadekimasaenn.firebaseapp.com」と表示されています
ここの表示は前回の記事の⑧「一意のプロジェクトID」で設定した表示になります。

※一意のプロジェクトIDは初回設定後は変更できませんのでご注意ください
アカウントを選択すると、設定した画面が表示されました!

終わりに
意外と簡単にSNSのログイン機能を実装することができました!
Googleの設定は最も簡単にできるようです。他にも似たような手順でログイン画面を作ることができます。
TwitterのSNSログインを作るのは開発者アカウントが必要なようです。
今後実装してみたいと思います。
現在のソースコードではURLを知っていれば直接アクセスできることができてしまうので、そこの対応は必要です。